Google designed Chromecast Audio to bring smart streaming to any speaker system. It is small. It is powerful. Using it becomes simple with the correct setup. Many users still search for help because setup steps can feel confusing at first.
This blog explains how to configure Chromecast Audio in a clear and simple way. Someone uses easy words. Someone shares short sentences. The text includes both active and passive voice for clarity. You’ll also learn how to fix common issues, like Chromecast audio not working. Proper Chromecast audio setup can make a big difference, too.
What Is Chromecast Audio?
Chromecast Audio is a Google device. It streams music to speakers. It works with Wi-Fi. It connects to powered speakers, sound systems, or receivers.
Read Also: How to Update Chromecast 3rd Generation: Step-by-Step Guide
Your phone, tablet, or computer sends music. The audio plays through your speakers. Your phone becomes a controller, not the source.
You need a correct Chromecast Audio configuration for smooth performance.
What You Need Before Setup?
Before you begin, make sure these items are ready:
-
Chromecast Audio device
-
Power cable and adapter.
-
3.5 mm audio cable or optical cable
-
A speaker or an audio system.
-
Wi-Fi connection
-
Smartphone or tablet.
-
Someone has installed the Google Home app.
If one item is missing, setup may fail. Many cases of Chromecast audio not working occur because someone skips something.
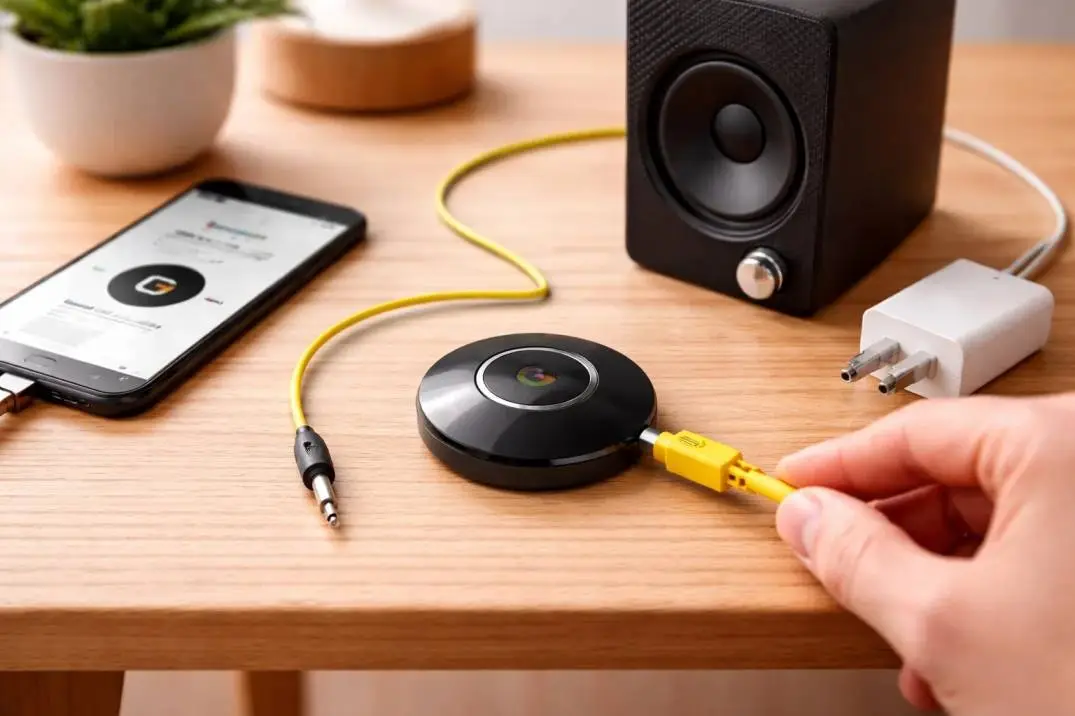
Step 1: Connect Chromecast Audio to Power
First, you must power the device.
Plug the USB cable into the Chromecast Audio. Connect the other end to the power adapter. Plug the adapter into a wall outlet.
A light will appear. This shows that the device powers on.
Step 2: Connect Chromecast Audio to Speakers
Now the audio cable is used.
Insert one end of the 3.5 mm cable into the Chromecast Audio. Insert the other end into your speaker or receiver.
If your system supports optical audio, use the optical cable instead. This method provides better sound quality.
This step is important in every Chromecast Audio configuration.
Step 3: Download and Open Google Home App
The Google Home app controls setup.
Open the app on your phone or tablet. Sign in with your Google account.
Turn on Bluetooth and Wi-Fi. Allow location access. These permissions help detect the device.
Step 4: Add Chromecast Audio in Google Home
In the app, tap the “+” icon. Choose “Set up device.” Select “New device.”
Google Home will search for nearby devices. Chromecast Audio should appear on the screen.
Tap the device name. Follow the instructions.
Step 5: Connect to Wi-Fi
You need a Wi-Fi connection.
Choose your home Wi-Fi network. Enter the password. Wait for the connection to complete.
This step may take a minute. Do not close the app.
Weak Wi-Fi or wrong passwords cause many Chromecast Audio not working issues.
Step 6: Name the Device
The instructor will ask you to name the device.
Choose a simple name like “Living Room Audio” or “Bedroom Speaker.”
This name will appear when casting music. It helps you identify the correct speaker.
This step completes the basic Chromecast audio configuration.
Step 7: Adjust Audio Settings
Open device settings in Google Home.
Here you can:
-
Adjust volume
-
Enable full dynamic range
-
Set default music service
-
Group with other speakers
Full dynamic range is useful for high-quality speakers. It improves sound depth.
Settings should be tested after setup.
How to Cast Music to Chromecast Audio?
Casting is easy.
Open a music app like Spotify, YouTube Music, or Pandora. Tap the Cast icon. Choose your Chromecast Audio device.
You Must Also Like: How Do I Stream to Chromecast? A Comprehensive Guide
Music will start playing through your speakers.
You can now lock your phone. Music will continue playing.
Common Chromecast Audio Configuration Problems
Even with simple steps, problems can occur. Below are common issues and solutions.
Problem 1: Chromecast Audio Not Working After Setup
This is a common complaint.
Possible reasons include:
-
Wi-Fi signals are weak
-
The audio cable is loose.
-
The speakers selected the wrong input.
-
The system has disabled app permissions.
Solution steps:
-
Restart Chromecast Audio
-
Restart router
-
Reconnect the audio cable.
-
Check speaker input mode.
Restarting devices fixes most cases of Chromecast audio not working.
Problem 2: Device Not Found in Google Home
Sometimes the device is not detected.
Fixes include:
-
Turn Bluetooth on
-
Move phone closer to device
-
Reset Chromecast Audio
To reset, hold the button on the device for 25 seconds. The light will change. You can then start the setup again.
This reset helps restart Chromecast audio configuration from scratch.
Problem 3: No Sound Playing
If casting works but you hear no sound, check these points:
-
Volume level in Google Home
-
Volume on speaker system
-
Audio cable connection
-
Speaker mute settings
Sound issues are often simple. They are often overlooked.
Problem 4: Music Cuts Out or Buffers
This problem relates to Wi-Fi.
Try these solutions:
-
Move router closer
-
Reduce Wi-Fi congestion
-
Use 5GHz Wi-Fi if supported
Stable internet is key for smooth playback. A poor connection often leads to complaints about Chromecast audio not working.
Advanced Chromecast Audio Configuration Tips
Once you complete the basic setup, you can explore advanced features.
Multi-Room Audio
Users can group many Chromecast devices.
Steps:
-
Open Google Home
-
Tap “Create speaker group”
-
Select devices
-
Save group
Music can now play in many rooms at once.
Default Music Service
You can set a default service.
This allows voice assistants to play music faster.
You can find this option in Google Home settings.
Guest Mode
Guest Mode allows others to cast without Wi-Fi access.
You can enable it in device settings.
This is useful for parties or shared spaces.
When Chromecast Audio Is No Longer Supported
Google discontinued Chromecast Audio hardware. Yet, existing devices still work.
We limit updates. Apps may change over time.
Proper Chromecast audio configuration helps keep the device working longer.
Tips to Avoid Future Problems
-
Keep Wi-Fi strong
-
Avoid moving device often
-
Update Google Home app
-
Use quality audio cables
These steps reduce the chance of Chromecast audio not working again.
Quick Summary
Here is a simple recap:
-
Chromecast Audio connects speakers to Wi-Fi
-
You need the Google Home app.
-
Wi-Fi and audio cable must be stable
-
Restarting fixes most issues
-
Proper Chromecast audio configuration ensures best sound
Final Thoughts
Learning how to configure Chromecast Audio is not difficult. The steps are simple. The results are rewarding. With the right setup, old speakers become smart speakers.
If Chromecast audio is not working, do not panic. Most issues have easy fixes. A good setup and stable connection make all the difference.
With the right Chromecast audio setup, your music sounds smooth, clear, and enjoyable daily.